Thursday, October 30, 2014

Happy Halloween!

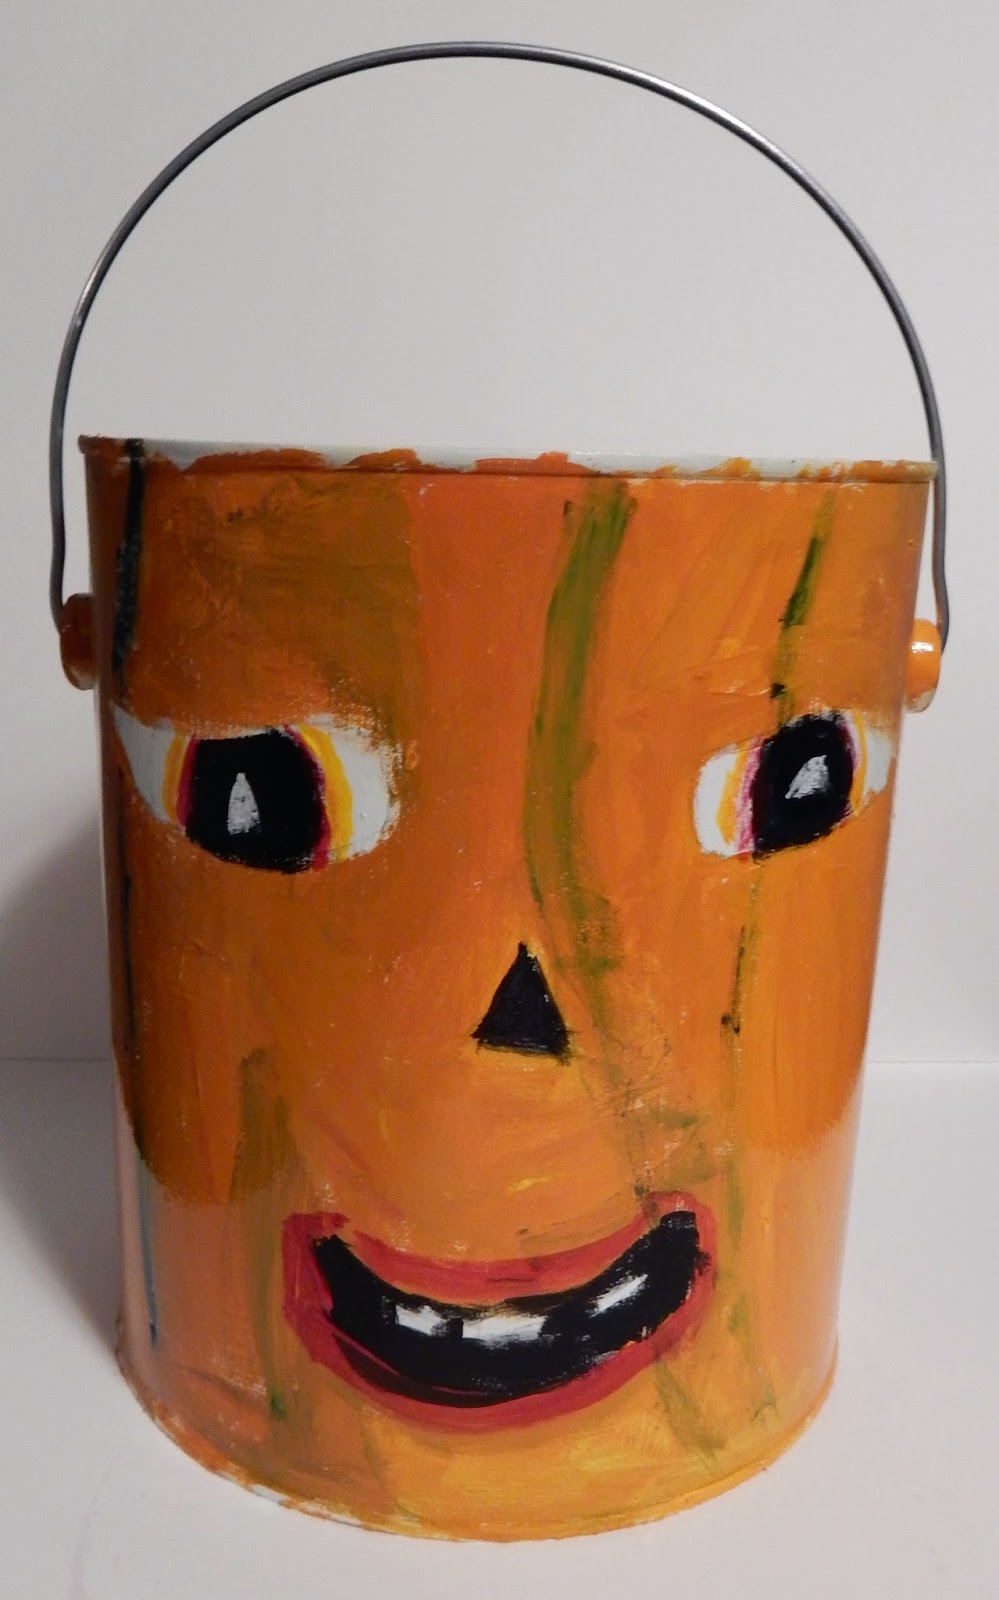
In honor of the holiday, here are some treat pails made in several of the classes this week.

Each child created their own concept for the pails. Some students chose to do something in keeping with their costumes, some did traditional Halloween symbols, and others were just way off the grid...in the best way possible! I was impressed with each and every one of them.

My youngest believes these pails aren't nearly big enough to haul the loot tomorrow night brings, but I thought if the kids didn't want to carry them, their parents could use them to pass out the treats.  I'm guessing they will be put to use both ways.

What I'm absolutely sure of is that each and every student was thrilled with the chance to create one.

Of course the fact I put some candy inside each bucket didn't hurt either.

Happy Halloween everyone.

8 year old


7 year old
to go with her butterfly costume

back

Sea Otter ghost, 8 year old


Back
"Happy Otterween"

11 year old, front


back

10 year old, front

back

 8 year old, front
"Monster Trucks"

back

8 year old, front

8 year old, back

Paint pails were donated to me by my oldest daughter from a display that was taken down at the leather store she worked for a year ago.  I treated them with gesso and the students used acrylics in primary colors with white and black.  I then put a coat of varnish on them to protect the artwork.


Wednesday, October 29, 2014

Self portraits repeat

Did I mention how excited I was to finally purchase mirrors for my studio?

So excited I figured every.single. class. needed to use them in the first week and so here are some self portraits created by the Thursday afternoon class with oil pastels.

Again, we talked about how their self portraits didn't need to look "exactly like them" but could just capture the personality of them.   

In my own artwork, I have been focusing on self portrait and I would just like to say that drawing yourself IS HARD!  I had forgotten what a challenge it can really be to look at yourself and then try to put the essence of your being on paper. 

And so during the process of my students doing self portraits, if I see any of them begin to get too bogged down in trying to create themselves, I will give them an out and tell them that it is OK for it to be "just a portrait of someone".   Usually what I find is that when the pressure is gone to "create me", they usually end up with a portrait of "me".

And for some in this class, this is what happened.  

I thought the girls all ended up with lovely work.

7 year old

7 year old

8 year old


Tuesday, October 28, 2014

Expressionist Self Portraits

I was very excited to finally order some double sided mirrors from Dick Blick that I have had my eye on for over a year now.  And so when they arrived, I naturally had to use them in class right away.

Hello self portraits.

But the students in my Tuesday class have all done a self portrait work once or twice with me already, so how to spice it up a bit?

Well, I decided to make them run.

Yes, that's right.

Run.

I put the mirrors and their paint palettes on one side of the room and the easels with their canvas on the other side of the room.

And they only had primary colors.

Why did I do this?

Well first, I wanted to help them try expressionistic painting.  And by putting their paints and mirror on one side of the room, they would only be able to do a stroke or two at each pass.

Second, they would really have to slow down and look at themselves in the mirror since they had to choose what strokes they wanted to add next.

And finally, it helps to put some distance between yourself and your work to really look at it.

But most importantly, what child would not think it was fun to have to run back and forth across the room while painting?

They did love the running.

But they weren't quite enthusiastic at embracing the fact they could only do one or two strokes at a time.  In fact, one student sneakily took her palette with her on a run and quietly began to paint the "regular way" until I caught her.

I loved the way the paintings came out at the end of class.  Keep in mind they only had primary colors, so were also having to think about mixing colors too.  Unfortunately two of the three kids walked out of class that night not loving their self portraits and so while I commended them on their success at staying with and learning a new process, I promised all of them they could sit down at a table with their portraits the following week and use whatever art materials they wanted to finesse their work.

I really loved their final work after the first night, but also respect that they all felt they needed to refine it to please themselves.  But I want to share both pieces here on the blog so you can see what I felt was a successful expressionist work of art and also the beautiful portraits they took home after the second week of class.

Expressionist portrait, 11 year old

I truly love this piece and although it does not look EXACTLY like her, it definitely captured the essence of the artist in spades.  Below is the additional work she did the second week.


And then there was this artist who was happy with her artwork after the first night.  Whether that is because she was a sneaky, sneaky artist who might of gotten her palette past me and to her canvas for a bit when the others didn't, I don't know.  But she went on to a new project the second week.

Expressionist portrait, 10 year old

And then there was this boy.  This was a painting style waaaay out of his comfort zone.  He is a very confident artist, but he was definitely feeling unsure during this process.  Yes, he liked running back and forth but he had a hard time really figuring out how to like an expressionist style of painting.  To me when I look at this artwork, it captures the artist very well.  I also think it does a marvelous job of also capturing his feelings during this process.  I thought this piece was extremely successful, but he did not share the same opinion.

Expressionist portrait, 7 year old

He thought he looked like a monkey. (he didn't)  He did the nose a hundred times and finally just painted it out when I assured him he could work on it the following week.   As I told him, sometimes it is about the process not the product, but I love this product.  I wish he could of seen it through either my or his mother's eyes.  

But as I always tell all the kids in my classes, you must please yourself first.  Not the viewer.  And so here is what he did to please himself the following week.


I love the details he added to the shirt and background.  He has a natural eye for detail.  He was much happier with the painting after the second week.  I think both are wonderful.

All in all, a fun way to do self portrait work.  


Monday, October 27, 2014

Halloween Matisse style


11 year old


In the Thursday evening high school class, I let the students choose their project ideas.  As they are discussing what they would like to do, I might suggest different mediums that they might not be aware of or have tried before, but for the most part, I am there as a facilitator for their ideas and visions.  I love working with this class because there is always such a wide variety of work being produced at any given time and it keeps me on my toes.

However when a student told me she wanted to do a Matisse style skull, I'm not going to lie, I was a little stumped.  I might of started to ask questions on how she envisioned creating such a piece as she put together words like "cheerful" and "skull", but  I handed her the acrylic paints and with interest began to watch what evolved on her paper.

And it was a really exciting process to watch.  I got involved helping another student who was working on a self portrait and looked over to suddenly see this student well on her way with her "Matisse style skull" and it was quite amazing.

She was so pleased with her work from beginning to end and I was quite pleased with seeing her vision come to life.  I am anxious to share some of the other projects being worked on by the students in this class as they finish.  There are quite a lot of interesting things being worked on in this Thursday class.

But for now, I'm quite happy to show you how one student explored Halloween, Matisse style.


Please note that the studio will be holding an all day workshop on Monday, November 10 from 9am-3pm for any interested student.  The cost is $60.00 for the day and space is limited.  Call or email the studio to reserve your child's space.

Sunday, October 26, 2014

Happy 8th Birthday Miss K!!!

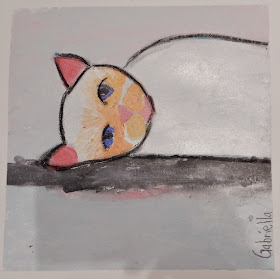
Saturday evening there were 8 little girls in the studio celebrating an 8th birthday.  The birthday girl is one of the students in the Wednesday class and so I knew she loved cats.  (a giveaway from all the talk of begin a crazy cat lady for Halloween)  And so in honor of the birthday girl and her love of cats, they all made acrylic cat paintings.

Sorry about the quality of pictures, we were quite rushed for time in the end.

Happy Birthday Miss K!  Thank you for letting me be part of your celebration.

\
birthday girl


Here's a couple of lazy cats.


And just a couple of cats.


And a preening cat.


and still more cats...


And one stylized cat


Saturday, October 25, 2014

Pumpkin Patch

Wednesday class created pumpkins in acrylic paint.  I always love how under the same instruction, you still see such a variety of finished work from the artist.

I am so proud of all three girls.

7 year old

8 year old

7 year old

Thursday, October 23, 2014

A Blue Jay who enjoys Halloween.

The Thursday afternoon class also worked on owl sculptures, although this artist did a very different take on the project.  She created a Blue Jay who is dressed up for Halloween wearing an owl's mask.  The mask is tied onto the bird's face with a piece of orange and white twine with a tidy little bow in back.

As if that wasn't cute enough, she created a Trick or Treat bucket with a wire handle and it is actually filled with candy pieces that can be taken in and out of the container.

I wonder if the bird's mom "accidentally" misplaces some of the candy treats too?

A lovely little work of art that the student focused diligently on for two full class sessions and a bit of a third.  I know the artist mom was more than ready to take the sculpture home to show it off.

And I can't blame her a bit.


9 year old


October Owls

The Monday afternoon art class started off the year focusing on owls.

It is October after all.

I went to the library and pulled a lot of reference books on owls for them to mull over and then they started by creating sculptures.


elf owl, 7 year old

I love the elf owl.  The owl itself is just about life size.  For those who don't know (i.e. me before the artist starting telling me all about this species), this owl is very small and lives inside of cacti.  I love that this little boy did not worry about making the cactus actual size but put one in to represent the owls environment only.

barn owl, 10 year old

Oh these eyes!  How could you deny this little fellow anything?  So stinking cute.

11 year old

And finally the artist who after looking at all the books, took the bits and pieces she liked and created an owl out of her imagination.  Love the nest she decided to place the barn owl in too.

Once they finished their sculptures, I gave them an opportunity to paint their owls in acrylic.

elf owl, 7 year old

I expected the cactus to make another appearance, but love that the artist decided to focus in on the owl itself in this picture.  I wouldn't mess with him.  He may be small, but he is mighty.

barn owl, 10 year old

I love the simplicity of this work.  She did such a wonderful job keeping the lines and details to a minimum, which has a wonderful effect on the work.

11 year old

I have learned to trust implicitly this artist vision.  She usually takes a left turn after I introduce the project and although I can't always connect the dots as she is explaining her ideas, when left alone she creates surprising and amazing work.  I would of not thought to put a sunset with the owl, but I think it works wonderfully!  I love the moon up high starting to make an appearance in the sky too.

I don't have to wonder hoo had fun creating this work, from the amount of laughter in the room it was evident all of them had a good time.


Wednesday, October 22, 2014

Sugar Skulls and teaching moments

School year classes started at Kudzu in the beginning of October, not that you would know it from the lack of posting on my part.  It was due to a calamity of errors on my part that needed fixing by my better half, husband, who was in Hong Kong the past three weeks for work.

Which seemed to mostly consist of sending my pictures of the protest two blocks from his hotel to turn my head grey, but that's another story.

The Wednesday class began with creating Sugar Skulls out of clay.  I brought out a couple of skulls for them to look at for reference and off they went.  While they were creating their skulls, I told them a bit about the holiday that takes place in Mexico and what a wonderful way it is to remember loved ones who have passed away. 

When they were finished, I pulled out sharpie pens, acrylic paints and glitter glue for them to use to decorate their work.  As time ran out, I had pulled out some crepe paper for them to make flowers to glue on also and promised the girls we put the flowers on at next week's class.

Here is how a couple of skulls looked at the end of class that day.


Although it is a little hard to tell in the above skull, both of these students chose to use glitter glue in the eye sockets.  I thought it looked quite marvelous.


Unfortunately when I came back to the studio the next afternoon to teach, gravity had played a part in their creations and the glue that was once in the sockets, now ran down the face.

7 year old

Unexpected, yes!  Ruined, no!  At least not as far as I was concerned, I thought it turned out quite interesting and I knew this particular student would more than likely LOVE the results.

And when she arrived at class that next week, her response was just as I expected - a huge grin and a exclamation of "cool!"

7 year old


I was not quite as confident in regards to the other little girls' response and she was definitely unsure at first.  I think it helped that her friend was so enthusiastic about the changes, but for her, the skull was suppose to be happy...not sad.   So we talked about all the times people cry "happy tears", which then seemed to make everything OK.  

From my perspective, she wasn't so much as upset that the glue had ran but wrestling with how that interpreted into what she was wanting to convey in her sculpture.  Once she realized that people do in fact sometimes cry when they are extremely happy, she had no problems with gravity getting involved in the fun.

8 year old

Their other friend who also used the glitter glue a little less enthusiastically had no problems with gravity and so we took a minute to talk about why the glue ran on some and not others.  Without help, they all surmised  the glue had been applied to thickly. 

And so through the process, they learned.  I'm sure they will come back to this moment in the future when applying paint, glue, or other materials and remember the time when they applied things to thickly and they ran down the work over time. I believe even the student who did not have issues with running glue will also file the results away to utilize at a later date.

Most importantly, they learned to embrace the unexpected.  One of those great life lessons we all need when navigating through this world because as all adults know, you have a plan and then sometimes life has another plan. 

A lesson these students passed with flying colors while creating their sugar skulls.