Showing posts with label art class north vancouver. Show all posts

Tuesday, May 3, 2016

anne seims inspired watercolors

When we first moved back to Vancouver from the Seattle area, my oldest daughter was commuting across the city to her high school. Every morning she passed a gallery where she admired the paintings of an artist in the window. I heard about this artist almost every day when she finished school and over the next year and half, she followed the artist's work diligently, sharing with me her love of the artwork.

When it came time for her high school graduation, my husband and I wanted to buy her something that she could carry with her in life to remember this very momentous occasion. I told him we should go and look at the work of this particular artist at the gallery our daughter had passed every day. We did end up buying her one of the artist artworks and our daughter's reaction when she opened her gift was more than I could of ever hoped for, to this day, five years later, it is still her most cherished item and she still follows this artist religiously.

She gets so excited at each new exhibit of her work and each new success this artist finds and along the way, I too, have become a fan.

Ironically the artist is from Seattle and her name is Anne Seims.

mates (2010), Anne Seims

The above picture is from the Jacana Gallery website, the gallery my daughter passed each day admiring Anne Seim's work.

I have a small book of her work in the studio and have found that many of the children are also drawn to the magical quality of Seim's artwork. So much so, I decided to have the preteen class create a watercolor inspired by the artist.

George, 11 year old

If you have been following along the blog for awhile, you will recognize George. From time to time, the artist will use her dog in her artwork. This painting captures the character of her dog brilliantly.

moose, 12 year old

This moose is just wonderful! I believe her mother had it framed in a hot minute when the art went home.

These works were created in 5 layers using a high gloss medium. The girls first lightly applied the medium on the paper anywhere they wanted things left white. Then painted the first layer in either a light pink or yellow. From there on out, they repeated the steps of medium then paint, working up to the last layer in black. Then the entire work was covered in high gloss medium. Once finished, they went back into the art with a white gel pen to create all the details.  

"princess", 11 year old

I so love that this artist allows creative process to guide her. She did not start this thinking she would do a princess cat, but those lips begged to become a princess. Ironically this was inspired by a reference photo used to create "George" above. In one of the pictures the artist has of her dog, he is wearing a tiara. (one of the downfalls of living in a house with three little girls) This was the jumping off point for "Princess", as she looked like quite a diva with her lipstick lips. 

I love where the artist went with this work of her cat, I think she did too.

bunny, 10 year old

Finally this sweet bunny. The artist created such a soft and gentle painting. It's hard not to fall in love with this precious rabbit. The original marks she had made in the the gloss medium guided the addition of the flowers.

I put these artworks on the studio's instagram account and tagged Anne Seims. How thrilled were the girls when she commented on their works of art! They and their parents were so excited when I shared with them what she had written. It gave the girls such validation and I could not of been more thrilled for them.

And my oldest daughter? When I told her to go and look at the instagram post? She was beyond herself to say the least.

She is still Seim's biggest fan after all these years, along with four new young fans from the preteen class after creating these beautiful artworks inspired by her paintings.


Friday, April 29, 2016

tropical fish using french dyes

These beautiful fish were created by the Wednesday elementary age class using french dyes.

6 year old

The class picked a tropical fish from the reference folder that caught their fancy and then worked out a sketch of just the fish using copy paper. I encouraged them to draw large.

I find that by letting kids work out their drawings on "throw away" paper improves their drawings significantly since it removes the fear of "ruining" the good paper. It also gets rid of the need of erasers since kids can use a window or light box to retrace all the great things about a drawing and then focus on just the few things they feel are not working in the sketch. Once the girls liked their contour line drawing, they used carbon paper to trace it onto the very large watercolor paper and then went over the lines with permanent black pen.

8 year old

Some of the girls repeated their single fish drawing several times when creating their final composition.

6 year old

Each girl started with three colors of their choosing for the background. They applied the dye with a wet on wet technique, carefully making sure not to get water on the fish. This helped keep the dye from moving onto the fish. Some of the girls tried a blotting technique while the background was wet to add coral or seaweed, others added salt for interest, and some did both.

10 year old

The paper was so large that by the time they completed the background it was dry enough to start the fish. Then once the fist were completed, the girls could go back into the background on the areas they blotted to add coral or seaweed.

9 year old

I am amazed at the final work produced by the girls. It's so impressive. The tropical fish were a perfect choice for the girls to use for exploring french dyes on paper. They seemed to love the process and exploring what the dyes would do on their works and in the end were so pleased with what they had created from a simple contour drawing.


Monday, April 11, 2016

silk painting on canvas board

This is one of my all time favorite projects to do with children, silk painting.

It is a medium that absolutely every age group is successful at, all ages are fascinated by the process, and is enjoyed by kids and adults alike.

For the "Creatures Big and Small" camp, I decided to have the kids create a silk painting and then applied it to a canvas board for display.

I tacked each piece of silk onto some old embroidery stretcher boards that I have collected from the needle arts guild where I'm a member.  Every now and then a member will bring in old stretchers they no longer want and I quickly gather them for just this purpose.

4 year old

Each artist created a simple sketch on copy paper. I showed them how to use a window as a lightbox (along with a lightbox that I have in the studio) in order to keep finessing their sketch without having to erase and redraw everything. 

10 year old

When each child was happy with their sketch, they traced it lightly onto the silk with a water-soluble pencil. Then that evening after camp ended, I added the resist over their lines. This is a part I usually let them do, but given the very young age of a couple of the campers, I decided that it might be a bit frustrating for them. Since I literally just trace over the lines they drew on the silk, the integrity of their artwork isn't compromised with me taking charge of this step.

7 year old

The next day, I showed them on a scrap piece of silk some of the interesting things they could do with the dyes and then let them get to work.

6 year old

They had so much fun watching different colors run together and were fascinated as the dyes moved across the silk and then were stopped by the resist.

5 year old

The loved adding water drops and salt to create different effects and even when the silk was completely covered in color, they still wanted to add more just because they didn't want the project to end.

9 year old

When they were finished, I set the dyes and washed out the resist. Then when the silks were dried used matte medium to apply them to the canvas board. Then the next day, I gave each child the opportunity to add black line with a permanent marker since the resist left just white lines. In some cases where the resist just left a big while "hole", (like the eye of the flamingo above), I encouraged the artist to go ahead and draw in an eye and such. Then they signed their works and were done.

5 year old

They were so proud of their finished pieces and it was a joy to watch them get so excited as they watched the dyes move and the salts do their magic right before their eyes. Silk paintings are always one of the hardest projects to watch leave the studio as I so enjoy having them on display but I hope, no I know, the artists will enjoy them for many years to come.


Friday, April 8, 2016

air dry clay lions

The second week of Spring Break, I ran two camps out of the studio. In the morning, Studying Under the Masters and in the afternoon, Creatures Big and Small.

The Creatures Big and Small camp was on the whole a very young class, which was so much fun to work with on projects! The first project I introduced to the kids was a clay sculpture. As a group they decided to create lions since we were focusing on African animals that day.

9 year old

I allowed them to create these lions as big as they wanted, but had them start by creating the basic shape out of aluminum foil so it would dry by the end of the week. I went over all the basics with them, how to add a piece of clay by scoring and slipping, how to add texture, how they could use their fingers as tools to create indents where needed, and a few other things.

4 year old

They all truly enjoyed working with the clay. The little ones were thrilled that they were covering the "top secret" core of the sculpture (the foil) with clay so that no one but us would know about it. And if there hands got "too dirty" for them to handle, I had a bucket so they could rinse them off and then keep going.


10 year old

They spent a long time creating these works, even the very young children. Who doesn't like clay?

7 year old

Some of the artists decided to create lions while others created a lioness. I had reference out for both..

5 year old

Once they were finished, they wrote their names on the bottom with a toothpick and put them aside to dry. That was the hardest part of the project, waiting for them to dry. Each day they would come into the studio and make a beeline straight to the clay to check their progress. They loved admiring their works of art and each day asked the same question, "Can we paint them today?"

But by Wednesday an additional panicked remark began to be heard, "Mine's cracking!" Yes. The downside to air dry clay, cracking. It seems no matter what I do to slow down the drying process, there are the dreaded cracks. Thankfully after working with this stuff for many years, I have found some ways to hide the cracks.

When they are completely dry, I add a glue adhesive over the cracks made for clay. Once that is dry, I add a gesso made for clay that I got at the art supply store. It is one of the greatest discoveries I have ever made! You just spray it on and it dries almost instantly. I do two coats and one small can seems to last forever, so worth the small investment to have in the studio while I save up money for a kiln. Once these two things are done, there is virtually no evidence of the cracks.

6 year old

Finally the day to paint arrived on the last day of camp. The kids could not of been happier to see their sculptures on the tables when they arrived for camp with paintbrushes lying next to them. Some of the artist took their time, mixed the perfect shade of brown to add to their works while others just got lost in the process of adding color and watching what happened. No matter how they decided to paint, they each enjoyed working on their sculpture.

5 year old

One of the five year olds is in the weekly Kindergarten class I run on Tuesday afternoons during the school year. I asked him what he liked best about the camp and without hesitation he replied, "the clay".

I'm going to guess some of the others would agree.


Thursday, March 24, 2016

Charcoal Birds

Last week on top of running the "Hello Vancouver" spring break camp out of the studio, I also ran an art camp for the North Vancouver Community Arts Council called, "Birds of a Feather". There were 12 children in the camp, ranging in age from 5 to 9 years old.

One of the projects they created on the first day of camp were these charcoal drawings. Needless to say, the kids looked like they had been in the coal mines when finished but I am so proud of the work they accomplished.

For the  younger ones, this project required that I introduce a new step each time they hollered, "I'm DONE!" To their testament however, they were open and eager to each new step suggestion I offered so in the end it is hard to imagine six year olds created some of these pieces. They even surprised themselves and from that point on were happy to listen and try anything I might suggest.

Wish my own kids behaved that way, I wouldn't need to break open the scotch some evenings.

7 year old

I began by simply having the students rub charcoal all over the paper and then take a paper towel and blend it.

6 year old

8 year old

From there I asked them to pick up the charcoal and find the shapes of the bird reference they had chosen. When they were happy with the shapes, they connected them together and sketched in the main details of the bird, the beak, the eye, and any 'feather caps'.

9 year old

At that point, I asked each artist to pick up the gummy eraser I had provided them and erase away all the light areas of the bird. Once they each got over their fascination with the gummy eraser, they enjoyed drawing with an eraser instead of a pencil.

6 year old

9 year old

The above eagles were created by a brother and sister. How lucky are the parents to have these lovely matching pieces to hang side by side? I was so impressed with the relationship between this brother and sister throughout the entire week, so very supportive of each other.

5 year old

Once they finished erasing out all the lights, I asked them to pick up the charcoal and begin adding all the darkest areas of the bird and then softly blending it into the piece.

6 year old

7 year old

By blending each time they added a dark, they began to create shades of grey into the work. I had them do this until they felt they are finished and then asked them to put in the blacks one last time. What you have is a lovely charcoal filled with tones of black.

7 year old

Then finally I asked them to go back and look at their reference and find some details they wanted to draw into the bird. What way do the feathers fall? Does the bird have any interesting marks? What happens around the eye? It was interesting to watch how each child interpreted this instruction.

6 year old

With a final instruction to add a little white highlight dot on the eye with the eraser, the works were complete. Although we were all a dirty mess at the end, the artworks were worth it.

Their beauty speaks for itself.


Thursday, February 11, 2016

outsider art inspired acrylic paintings

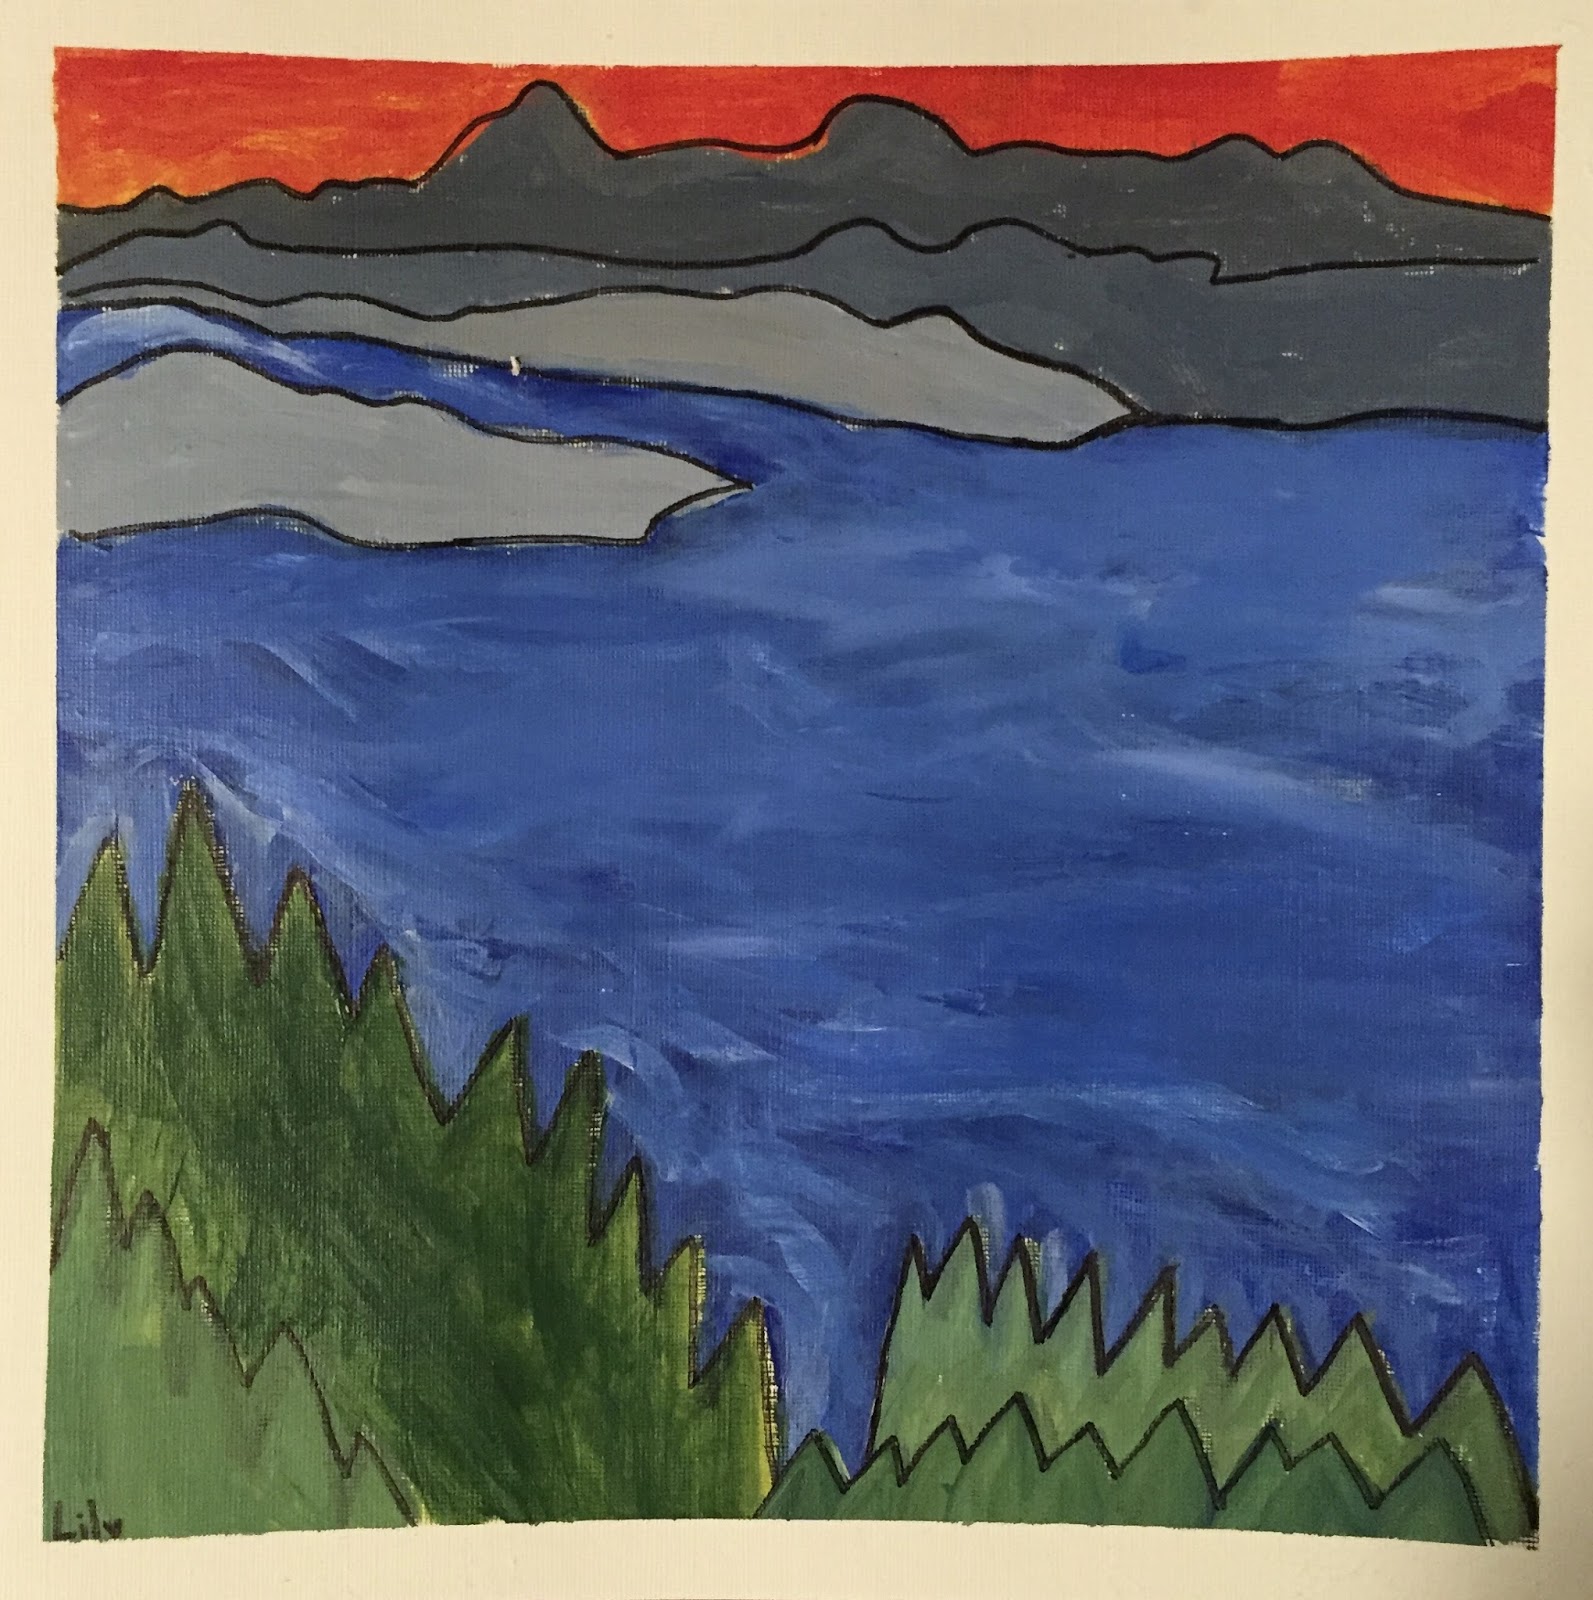
In the Wednesday elementary class, I introduced outsider art, also called folk art.

In particular I presented the works of Canadian artist, Maud Lewis.

The kids were quite fascinated by her, her life, and the role of growing up with juvenile rheumatoid arthritis had on her life. What sealed the deal for the students though was Maud Lewis's little house, a house she decorated from top to bottom in her paintings...the walls, the wood stove, the stairs, the windows....EVERYTHING.

Once I finished answering a multitude of questions regarding Lewis and her life, the kids began to create their own works of art.

Like Maud Lewis, the kids painted scenes from their daily surroundings.

They all painted a Vancouver landscape.

8 year old

We discussed how they did not need to draw things realistically, nor paint in realistic colors. We discussed how Maud Lewis kept her colors flat and how might they to the same.

6 year old

When they were happy with their compositions, each child traced their lines with a black oil pastel and then were given just primary colors with white, black and brown to use for mixing their own color palettes.

8 year old

When they were finished painting, they had the chance to go over their black lines with either the black oil pastel or in a couple of cases, a black permanent pen.

6 year old

6 year old

I think they were all quite pleased with their work when finished. I love the array of styles that were inspired by Maud Lewis.

10 year old

10 year old

After seeing the response the kids had to this particular artist, I have no doubt I will be introducing her again to the other classes. I'm thrilled that the students took such a liking to Canada's most famous outsider artist.

8 year old


Monday, February 1, 2016

american girl doll portrait

With vacations on the list, I had just one student in the drawing class this week. At the end of the prior class, I asked what she wanted to spend the hour drawing and what I learned was she, like a lot of little girls, was a huge American Girl doll fan.

She wanted to practice drawing her doll.

And so this week, she brought her doll, Rebecca, to class.


I was quite excited to create a lesson on drawing the face in such a fun and inviting way for a seven year old.

Even so, it was not without it's challenges and we spent the first half hour just focusing on parts of the doll face and gaining confidence.

Then using a pencil, she began to create a final drawing. It was very rewarding to watch her get more and more excited as the drawing near completion. She was so proud of herself, which was a long way from the frustration she had felt earlier when struggling with the mouth.

At the very end of the hour, I gave her some conte crayons to add a bit of color to her drawing. 

7 year old

I think she did a wonderful job and learned an awful lot about portrait drawing, however the bigger lesson here was not giving up when something is hard. What she really walked out the door with was a sense of real accomplishment, empowerment if you will, knowing she can do anything- even when it at first feels like she can't- if she doesn't give up.

All thanks to an American Girl doll named Rebecca.


Tuesday, January 26, 2016

drawing boats and learning composition skills

I have a little boy in the Friday drawing class who, well, loves to draw.

It is a joy to watch his enthusiasm as he immerses himself in his work. He has no fear. He draws with gusto and abandon. It is so inspiring to observe.

He is all of 7 years old. I think those artist, like Picasso and Basquiat, when they talk about children's art, must of been privy to spending time with a child just like this one.

He asked to work on drawing boats in class. I pulled off a few worksheets for him to study on boat drawing and then offered him some suggestions on how to draw a boat.

(not that he really needed it)

He studied and studied the worksheets and then just went for it. His first boat he created in charcoal.

7 year old, charcoal

Lovely, yes?

So building off the one point perspective from the week before, I introduced the importance of background, middle ground, and foreground in a composition. Building upon his desire to practice boat drawing, he created a composition with a boat in charcoal.

7 year old, charcoal

He was quite excited about his silhouette of the fisherman too. He did several of these practice drawings, working out different things. You can see here that he reworked his dock using the one point perspective exercise from the week before.

After several of these, he decided to pick up the pen and ink and create one last boat.

7 year old, pen and ink


A combination of everything he had worked on in the hour, it is a lovely little piece I promised to mount for him.

I am loving the organic nature of evolution in the Friday drawing class. I think the kids are really enjoying it too. A whole lot of different drawing tools out for their choosing and the opportunity to just problem solve with newsprint and charcoal if they want.

The other student did some work on creating a landscape composition in charcoal but then wanted to work on shadowing towards the end of class with a pear.

She started with charcoal, then art stix, and then pen and ink. I encouraged her to keep things quite loose.  

8 year old


Next week she is quite excited to bring her American Girl doll to sketch. It should be quite fun.


Wednesday, January 20, 2016

Michelangelo inspired plaster paintings

This past Monday, the students showed up to class to find blankets on the floor under the art tables.

Gotta keep those kids guessing!

It took about a millisecond for them to scurry under the tables to figure out what was up, which was plaster taped to the bottom of the tables.


I created these about an hour before class started and they were oh so easy to do. A piece of burlap and then you mix up a basic recipe of Plaster of Paris and pour it on top.

I put the burlap on a piece of cardboard when I created these just to keep things a little cleaner and then recycled it once the plaster was dry. The great part about the plaster being on the burlap is that if it breaks, it still stays adhered to the work.

In fact, in past projects I have encouraged students to actually break their work at the end to imitate the old frescoes we admire. You can see the results from older post here and here, (these were not created under the table)

So to say that once the discovery was made that there were things taped under the tables for art class, instead of on top of the tables, the excitement level grew exponentially.


I had a hard time getting the kids to come out from under the tables in order to get started! But the lure of discovering what we were going to do with that plaster finally enticed them to come out and let me present the project.

I told them a bit about Michelangelo and showed them some of his sculpture work, both finished and unfinished. Yes, the sculptures were anatomically correct and yes, an eight year old boy honed in on that immediately with an exclamation of "ew, his thingy"

So we quickly moved on to the Sistine Chapel and the Pope because that seemed like the perfect lead in after the "ew" comment. 

lawd have mercy

I love the Sistine Chapel, as someone who admires art, visiting here made my head spin. Where to look? It's amazing to think that Michelangelo's work can actually make you forget to look at the marvelous Botticelli's also in the room and I did indeed not mention these when talking to the kids.

To be truthful, the vast amount of art at the Vatican made my head spin in general....or was it the fact I made it out of the Vatican alive without being struck down by lightening? Could be a bit of both, but back to Monday night.

What I love best about presenting Michelangelo's work in the Sistine Chapel is that it is a great example of how an artist learns as they create. 

We talked about how the artist could not see his work as a whole while creating and when the first section was complete and the scaffolding was removed, he realized when looking at the work from the floor it was hard to see all the small details. So he simplified his images, painted things much larger and the kids could actually see that change in the progression of the work from the front to back of the chapel ceiling. 

We also talked about how long it took Michelangelo to complete this work and how impatient the Pope was with him. 

And finally we talked about how difficult it must of been to paint a ceiling, which was the lead in to the project.

Now while I realize it is just a myth that Michelangelo painted the chapel on his back, that is what we did as it created a sense of just how challenging it must be to paint something from above.

Plus let's get real, the idea of painting on your back was just plain ol' exciting. 

Without doubt I will say that each child had a great appreciation for Michelangelo's work at the end of the night and had a great time doing something very different. 

As we were getting started, I asked each child what story they wanted to convey in their artwork. 

Was there a favorite family story they wanted to illustrate? 

A favorite book? Or movie?

Two boys, brothers, jumped right in and created works of their favorite television show.

6 year old, "weeping angel"

Are all you Dr. Who fans geeking out about now? I know my oldest daughter did when she saw these two pieces. 


8 year old, "Dalek"

For the other students the idea of creating a story stumped them and so when one asked if he could just do an animal, I encouraged him to move forward with the idea. 

8 year old, "tropical snake"

The other two students followed his lead and also chose animals to create on their plaster.

10 year old, "walrus"

8 year old, "komodo dragon"

My heart skipped a beat as the artist who created the dragon exclaimed, "Hey, I have to hold my brush up high like when we created the trees! 

He was talking about the Matisse project we had done in December, where I put the paintbrushes on long sticks and asked them to create a tree. That he was pulling a skill and experience from a past project to apply to solving a problem on this project just made my night.

Because there was a big learning curve on how to paint while lying on your back!

The kids each had a palette of watercolor paint. I used tubed watercolors for this project, you truly need just the smallest of dollops of paint. I put their palette on a plastic lid to give you a sense of just how little paint is needed.

One paintbrush and a bit of water and kids are off to the races.

I like the tubed watercolor for this project because I don't have to worry about paint dripping on the kids. They can also hold the palette upside down and the paint stays on the lid. Plus since it's watercolor, I can create the palettes long before class starts without worrying about them drying out.

When they were finished and the plaster was off the bottom of the table, I gave them the opportunity to use a thumbtack to add line work if they wanted. This was much needed with the "weeping angel" artwork and helped bring back his original drawing.

And how did they put their original drawings on the plaster? Because you can't erase on plaster, if you make a mark it's there for good. 

The kids created their sketches on copy paper. We then traced them on the plaster. I had carbon paper for them to use, but if they created carbon lines on the back of the paper by rubbing their pencil, I believe it would do the same thing.

Finally I cut away the excess burlap and they were done.

I know they will remember this night for a long time.

The project was a great lesson in learning to simplify and loosen up brushstrokes. 

But most importantly, the night was exciting. Exciting to try something so different, exciting to paint on an unusual surface and most importantly exciting to paint under the table instead of on top.

Needless to say, Michelangelo was a big hit.