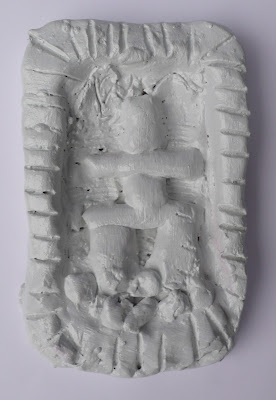
I asked each of them to carve out the middle of the tile leaving at least a half inch on the bottom and a nice frame around the sides.
12 year old
Then with the clay they dug out, told them to build a Vancouver scene. I had brought along some pictures of the famous Inukshuk for inspiration that's in English Bay.
9 year old
9 year old
6 year old
Before they began to build the "hero" of the piece, I asked them to use a toothpick to draw in a background. They could also build a background using clay if they wanted too.
And of course some kids went another direction with the project, which is why I love working with children so much because you never know what element of surprise they will add to the project concept.
7 year old
9 year old
7 year old
9 year old
7 year old
For some reason the clay really inspired the kids to create reliefs highlighting the great mountain trails around the city.
The giant trees of Stanley Park or just the beautiful cedars many of us are lucky enough to have towering in our yards.
despite the mess they leave on the ground
When they thought they were done, I reminded them of the importance of foreground and asked them to place some things in front of their trees or Inukshucks.
11 year old
Or in the case of the dry river bed, have some rocks and logs deeper into the clay than the rock in the front of the clay.
My plan was to paint them white once they were dry to resemble the marble reliefs they may have seen in museums. But then I began to feel a pang of guilt that they might not like me painting them out and so one morning left it up to them to make the decision.
Having created relief tiles in the past that I then let the students paint a variety of colors, I felt a lot of their detail work was lost. This time I really wanted to have them be one color so all the work they did creating the detail was the hero of the project. So I asked the kids if they would like to paint out their tiles with their favorite color, but just one color, or have me spray paint them out white.
I explained to them my past experience with this project and why I thought the work would be much stronger with just one color.
And then I left the decision up to them.
And unanimously they wanted me to spray paint them white.
I'm not going to lie, I was a little surprised. I honestly thought they would want to paint them but in the end, I put a coat of spray paint over the tiles.
I'm not sure this step was completely necessary. They did look beautiful "as is" in their raw form.
Next time I might even simplify the color process more and just give them a quick varnish spray for protection and leave them in their natural state.
But this time however, I had to paint them. One of the tiles was accidentally stepped on while it was in the sun drying midweek. The student felt horrible that he had broken another students' work, (so did I) and I was so impressed with the attitude of the child whose work was broken. He did not flinch and told the younger boy that all was fine, which made me want to figure out a way to fix the piece even more!
Thankfully the break was pretty clean and with some very strong glue, the heavy duty cardboard from the back of a drawing pad, and the white paint, I bet you can't figure out which piece was in four pieces.
(it's the last one!)
All's well that ends well as they say and this project all in all ended well.


No comments:
Post a Comment