Showing posts with label printmaking with kids. Show all posts

Monday, May 25, 2015

Printmaking with summer in mind

I had two students who wanted to explore printmaking.

Both will also be spending the summer abroad, one in Southeast Asia and the other in Argentina.

And so I figured it would be a good opportunity to have each student create not only a print for framing but also some cards that they could use during the holidays to converse the old fashion way.

Yes, I know I live in a dream world, snail mail for a generation attached to their phones and computers.

The 14 year old admired a sea turtle print I had in the studio that a friend of mine had created for her family Christmas cards a few years ago.  A friend who I worked with in our children's elementary school running the Art Docent program for years and is a very talented artist.

The students' attention to detail when it came to carving her block was quite impressive, especially to the other teens in the class who had done this project already.  They knew the time and effort she had taken to create her work and praised her accordingly.

14 year old

Once she had a print she was happy with, we took a collection of the other prints and made them into cards.


And then just for fun, I had her take the silk dyes and paint a background on silk that we then adhered to bristol board with matte medium.  She is not necessarily happy with this print, but next week will use it to create a mixed media project by adding details with a white gel pen and whatever else interest her.

I'm sure it will be quite interesting in the end.


The eleven year old student made the cutest little dolphin.  She used the soft cut block for carving and even added a second block for a "thought bubble" for adding messages to her cards.


Unfortunately I didn't get any pictures with the thought bubble added, so you'll have to take me word for it when I tell you how cute it actually looked.


I then had her print on a variety of colored paper using the same colored ink so she could see how a single color can change depending on what you pair it with.


I also had her explore tone on tone.  By the end of class, she had a lot of prints. So many in fact that her younger brother walked into the room with an exclamation of, "whoa!", he was so impressed. I mounted several for her that could be framed so she'll have gifts for her grandparents and relatives when visiting in Argentina if she so chooses. She might even decide to send her daddy one of her cards (or her art teacher) who will be staying in Canada during the summer.

All in all, I think both girls had a great time with the project.  Not really a surprise as I've yet to meet a child who doesn't like printmaking. There is something magical about creating a work with an element of surprise to it since you never know exactly what you are going to get when you pull the paper to see the print.  I'm sure you'll be seeing a lot more printmaking projects during the summer camps with all the students not lucky enough to be visiting family in far away places.


Wednesday, March 25, 2015

A Menagerie of Animal Prints


There is always one printmaking project during the week of camp and this one was no different.  Below are the series of prints the students made of an animal of their choice.  What a variety!

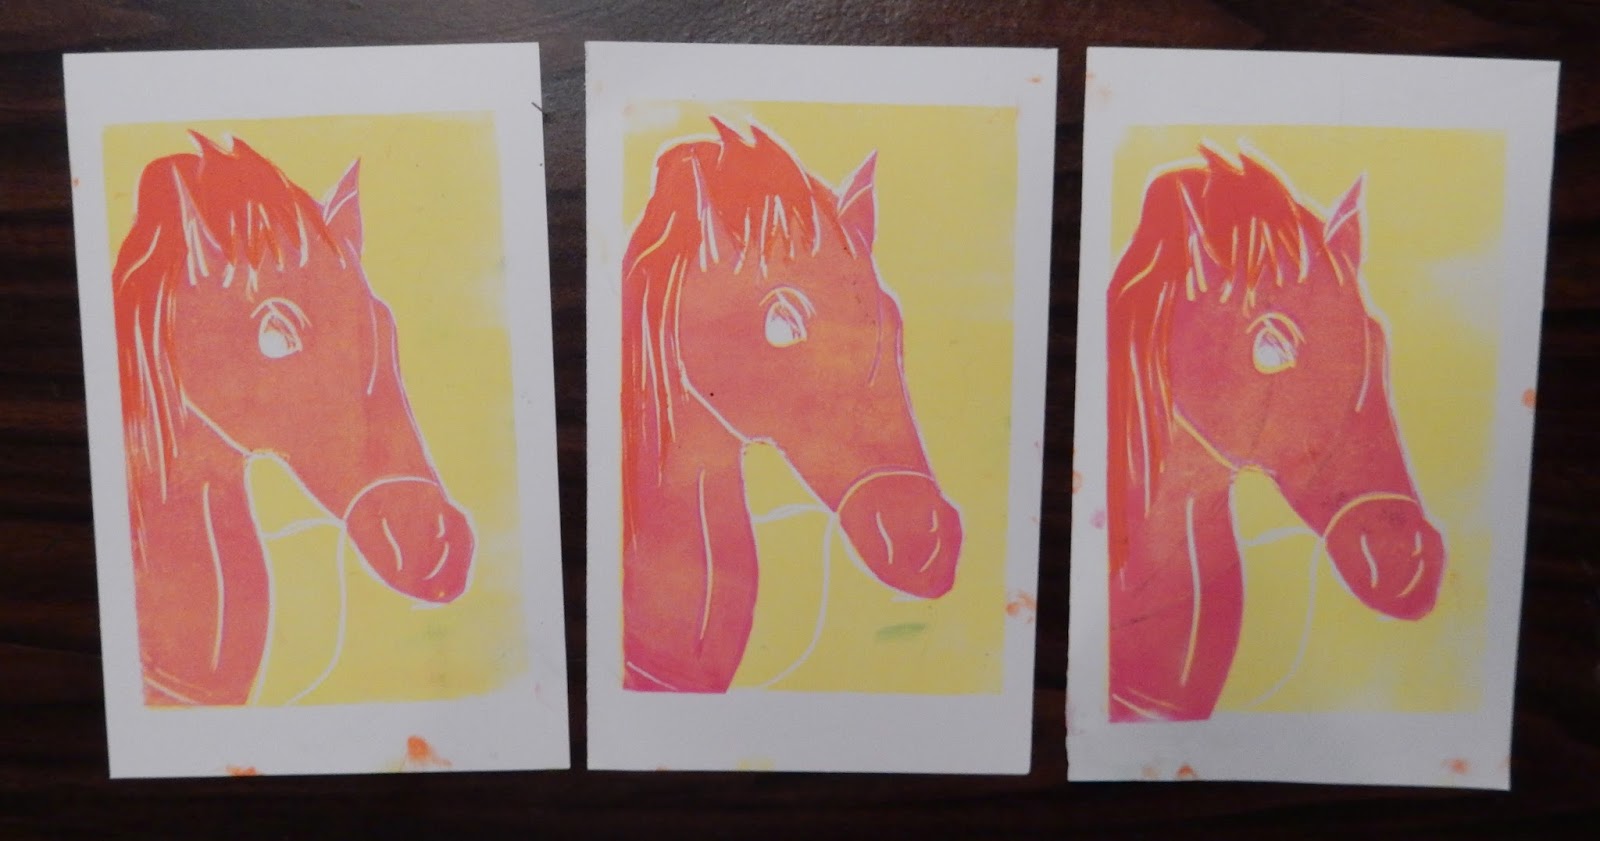
Each child did three prints.

Exhausting day for me, but well worth it as it is always one of the highlights of the week for the kids.

6 year old, dinosaur


8 year old


10 year old


8 year old


7 year old


8 year old


6 year old, dinosaur bird


Tuesday, March 10, 2015

B.C. Binning inspired art


It's Spring Break!

Which means I'm up to my elbows in all things art. This week I am running a week long camp focusing on artist from British Columbia at both the North Vancouver Arts Council in the morning and in my studio in the afternoon.

One of the first artist we looked at was B.C. Binning.


I decided to focus on his love of boats because I knew the kids would all be familiar with them since they are a staple around Vancouver.

I figured a fun way to get the kids to really take a boat image down to graphic shapes was to make them create a boat out of nothing more than shapes.  So with one piece of black construction paper, each student created a boat scene by cutting out nothing more than shapes.


Then using liquid water color, they applied primary colors to damp watercolor paper and while the paint was still wet, dipped the construction paper into water to wet it down and placed it on the paper.
When finished we put them into the sun to dry.  And what a beautiful day of sunshine we had!! It didn't take them long to dry at all, but we started another project all the same while we waited.

Then something amazing happened.  We had a little science mixed into our art lesson because anywhere covered with construction paper turned white...kind of like using sun paper without the expense.

Why did it happen?  Well because the paint exposed to the sun dries quicker, the paint underneath the paper migrates to the light to dry. Voila!  You have made a print.

7 year old composition drying in the sun


7 year old, finished work from above

The kids were pretty excited to pull the construction paper off and see what happened underneath when dried. Then we went over Binning's interest in architecture and how it was implemented in his artwork. The kids pointed out some of the different things they noticed in the nautical theme paintings I had brought as samples and then with rulers and sharpie pens began to add their own line elements to their work.

Below are some of the results.


6 year old


kindergarten

9 year old

Why is it kids feel they need to ask permission to do something in their art? It makes me so sad to think they have been given such rigid instructions in the past that they feel they have to ask me if it is OK to do something in their artwork.  It is their artwork!  I try to push them to try new things, but at the end of the day, I want them to also be true to themselves. For me the idea of introducing an artist and style to children is to inspire them.  For them to take what they have learned and then apply it in a way that makes sense to them. What fun would it be to just copy a work someone else has already done?

So when the boy below asked if he could do patchwork on his sail, well of course!  Do patchwork.  I think it's adorable.

9 year old

Add some stars and a moon!

7 year old

6 year old

 Love the nautical flags added into this one!

8 year old

And what an interesting way to add lines to the clouds and define the water.

7 year old


7 year old

9 year old


9 year old

7 year old

At the studio we took the work one step further and added some color with oil pastel. I love the way this artist did a separate linework drawing over her original drawing....kind of gives the impression of a nautical map.

9 year old

And the simplicity of this piece is stunning.  I love the reflection of the boat in the water.

9 year old

I love all the angles in this artist work.

10 year old

And nothing says Vancouver like a sailboat under the Lion's Gate Bridge.

9 year old

I think B.C. Binning would be proud of each and every one of these kids.

Wednesday, August 13, 2014

Paper sculptures with printmaking


This week I am doing a camp focused completely on sculpture work through the North Vancouver Community Arts Council.  I am very excited since I usually only do one sculpture project during a week camp and with a WHOLE WEEK of sculpture projects, I get to try a lot of things I just haven't had time to do before.

One of the challenges I set for myself was how to introduce other elements into the sculpture work to add not only variety in the week but also the opportunity for the students to learn some other things too.  I also wanted to show all the different ways the students could create a sculpture work, out of items they might not of considered before.

Like paper!

A flat piece of paper is not necessarily something 6, 7, and 8 year olds would think to go to with creating a 3D work!  Yet card stock and a pair of scissors is something that would be readily accessible to them in their daily lives.

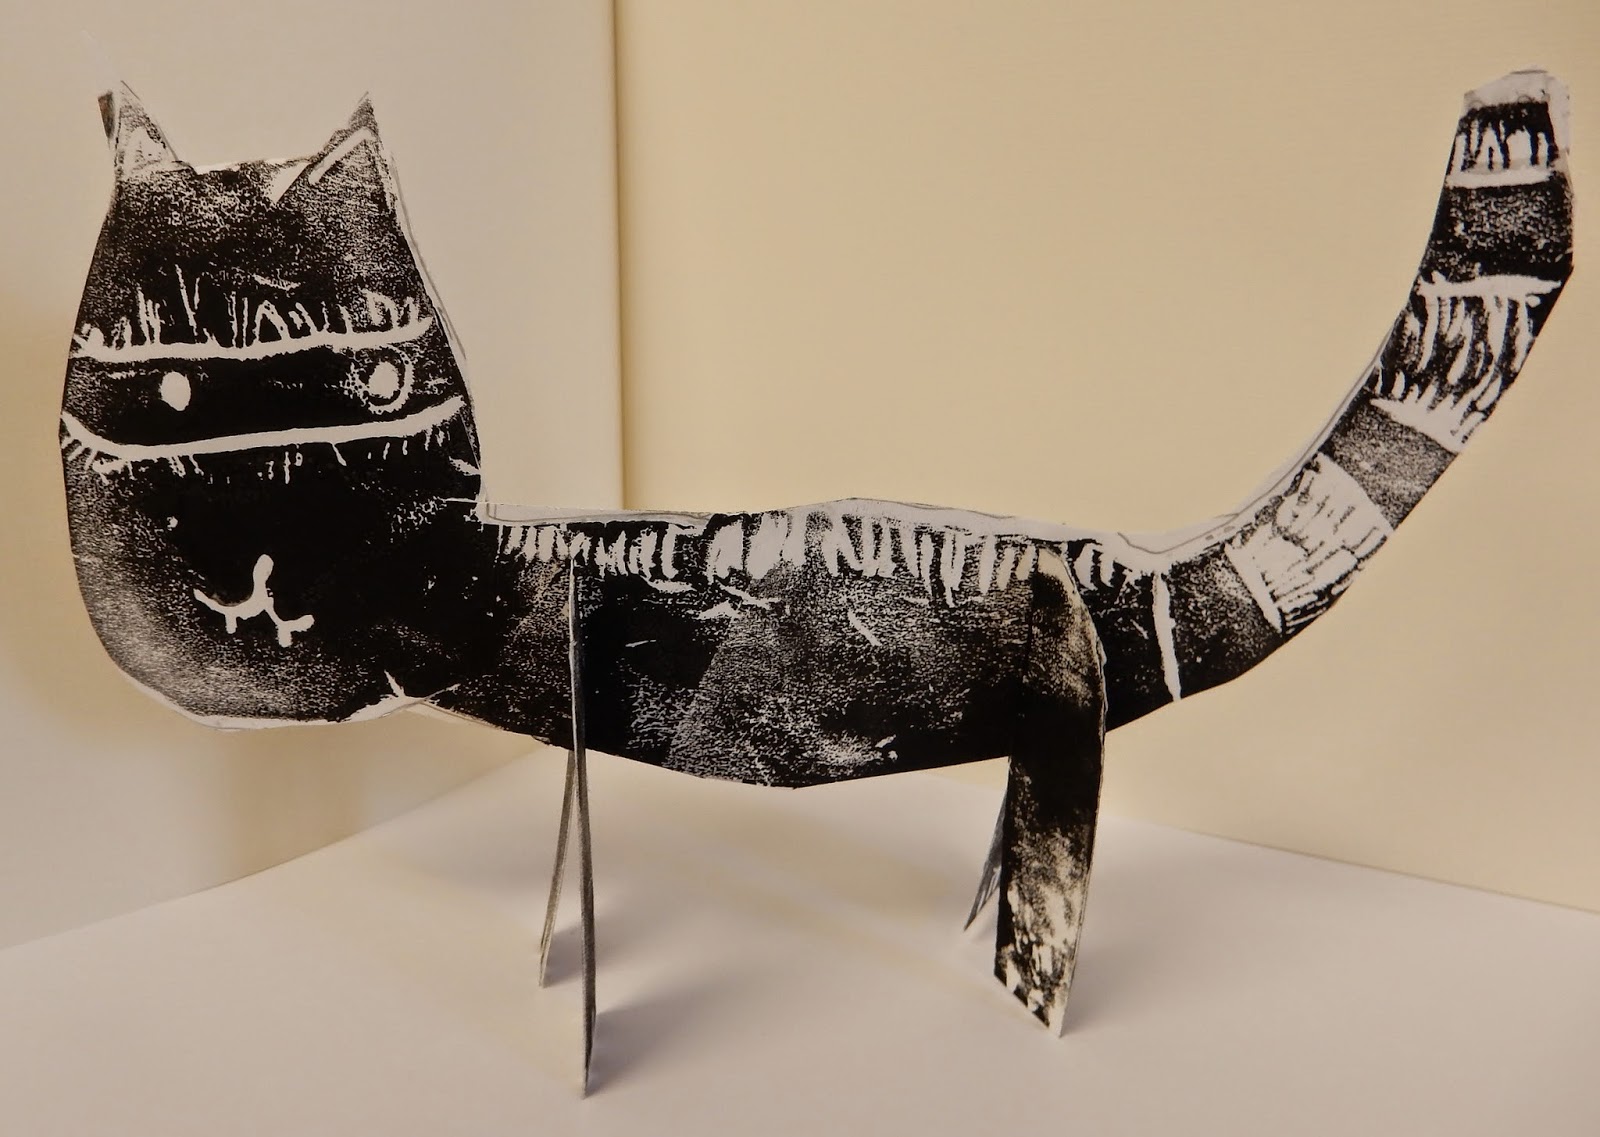
At first I planned to have them use oil pastels on the paper, but printmaking is one of the activities I have found is the most popular at camp and so thought I would take the opportunity to add relief prints to the project.

8 year old

In hindsight, I think monoprints would of been a better choice but in the end the students were very happy with the result.  However it was a bit confusing for them at first since they had to think of a relief print for not only the front of their work but also what it would look like from the back AND create a relief for the stand also....both sides.

For all of them this was the first time they have had to think of a drawing from not only the front, but the back also...quite a surprise at first and a good lesson in working out all perspectives of an idea.  Something they do when working in clay naturally so they don't have to give any real thought too.


cat, 8 year old


I gave them free range on what they picked as a subject.  I showed them the 3 parts they would have to cut and that the stand could be anything associated with their main idea, but they would need 2 of them.

Raccoon, 7 year old

And so stands were created that were legs and waves!!

Mermaid, 6 year old

How about this stylin' mermaid?  With her hair covering one eye!  Even though we pulled a couple of practice prints, this student did not "massage" her plate on the paper with quite enough pressure on the front.  However when she got to the back....


She corrected herself brilliantly.  On top of that, I think she did a great job working out what the back of her mermaid would look like, right down to the bathing suit tied together!  In the future, I think a great project idea might be to have students think of a subject and then tell them to draw it from behind.

Cat, 7 year old

The students also had their choice of a wide array of colors and surprisingly most of them picked black.  I wasn't expecting that to be the popular color choice.  I love that the above student made a decision to create a patterned design for her detail work on her cat.

I love how many different options I have as a teacher with this project and will definitely be introducing it again in the future using not only printmaking but pastels, paints, or watercolor.  As long as you have a heavy stock paper and a pair of scissors, the sky is the limit.


Thursday, July 24, 2014

Warhol inspired printed self portraits

I love introducing children to Warhol, discussing what pop culture use to be in comparison to what it is today and being hit over the head with how out of touch and OLD you really are when they look back at you like you grew another head.

yes. I love that.

But I do love how well kids respond to Andy Warhol's work and it is a great source of inspiration when introducing printmaking.  In the past I have done straight relief prints with the kids but I decided to try something new this time and I think the kids really got sick of me saying how much I loved everything by the end of the project,  but I could not be happier with how this project turned out for each and every kid.

I was worried.  It was far more complicated than what I have done in the past and I wasn't completely confident the younger students would be able to handle it, but things went off without a hitch and each and every child was able rise to the challenge.

We did reduction printing.  And instead of explaining the entire project at once, I did one step at a time and did not share the next step until we were ready to embark on it.  I think this went a long way in keeping the kids from finding it overwhelming.

First the students did a line drawing of themselves on their "working paper".  I traced the size of the styrofoam square on the paper so they didn't do their drawing too large.  Once they were happy with their drawing, I taped the styrofoam to the table and then just the top part of their "working paper" so they were able to lift it up and see if they had all their lines without having to worry about getting it back into the right place.  They then traced over the lines as instructed with a blunt pencil.  We then lifted the paper off the foam and I had them go over the indented lines one more time to make sure they were deep.

For the first print, I only had them to their outside lines.  The hair line and the outside face and neck lines.  I then let them pick between pink or orange ink and had each child pull three prints in the color of their choice.

I then had them put them in order from their most favorite to their least favorite.

Once every student had three prints.  We started the next step which started with them cutting their heads out of the styrofoam.  They then could cut their "working paper" heads out of the paper also to place over the foam.  Some did them and others decided to just wing it and not rely so heavily on their working sketch.  At this point, I had them add in the facial features and hair with the blunt pencil, either by tracing over with their working paper or just looking at it and putting the features in freehand.  They then went back to the ink station and put turquoise ink on their styrofoam plates.

Here's the tricky part, getting it on register.  When we looked at Warhol's work, I emphasized how he put things off register.  How that added an energy to the work and how "boring" it might look if it had been perfectly registered.  I did this knowing that their work would probably not be perfectly on register and I wanted them to embrace that aspect rather than think of it as a mistake.

I also had them start with their least favorite first pull so there wouldn't be so much pressure to "get it right".  They had two practice go's to get confident with the process before placing the second pull on the final paper.

But to be truthful, they didn't really have any problems from the start, even the six year olds.  Having cut the head out of the styrofoam made it quite easy for them to place it darn near perfect on register.

When they did the second step on all three pulls, I then told them I wanted them to pick one part of their drawing to highlight with a third color.  Most chose their hair, but some picked a necklace or the flower on their headband.  They then went back to the ink station and used a royal blue for their final color.

I think the results are fantastic and would encourage anyone to try this project with children.

6 year old

10 year old

6 year old

7 year old

7 year old

6 year old

8 year old

6 year old

8 year old

6 year old

10 year old