To be truthful I figured it would be more of a tourist trap and less than inspiring, but my husband and I have been through the museums of Amsterdam a good dozen times so thought something new was in order.
I was so pleasantly surprised by the house, yes, at times it is a bit of a tourist trap but then you get to the second floor where Rembrandt's studio would of been and I could of spent all day there.
And I do mean all day as they had an expert on hand who has studied Rembrandt's traditional ways of mixing paint and was recreating them right in front of you. His extensive knowledge on Rembrandt's painting techniques and techniques of that period was so impressive and quite interesting.
I have lots of ideas for the high school class on some of the things I learned but this post is about the elementary classes and the project idea I was inspired to try from Rembrandt's house for them.
The house has a huge collection of Rembrandt's etchings. They are quite beautiful and I left Amsterdam wondering how I could present this to the students without a studio press.
And most importantly how to do it at home, should they choose, without breaking the piggy bank.
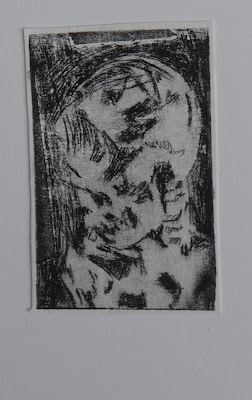
Using heavy acetate, I cut a square for each child on my cutting board. Then I brought out the scratching tools we use for scratch art, I wasn't sure if it would work, but it worked amazing.
7 year old
I then brought out all my skeleton/mummy reference I have collected from old National Geographic magazines.
Each child choose an image before getting started, like Rembrandt, I asked them to scratch out all the darkest areas first.
8 year old
I then showed them how varying space between the lines would create different value.
10 year old
I think the students found it very relaxing to scratch into the acetate once they realized they didn't have to scratch hard and creating their etching held their attention for much longer than I expected.
9 year old
When finished, we covered the plate in black water-based printing ink and they rubbed off the excess with a paper towel. Then using either cut watercolor or bristol paper, they lightly sprayed some water on the surface of the paper, wiped it off with a clean sponge and laid the wet side of the paper over their plate.
10 year old
Using a clean brayer, they rolled over their plate until they could begin to see the edges of the plate through the paper, pulled the print, and voila!
10 year old
What happened when they didn't rub off all the ink from the plate?
10 year old
What happened when there was too much water on the paper? Or not enough?
8 year old
What happened when they put light pressure or heavy pressure when rolling the brayer to make the print?
10 year old
And finally what happened when you printed on watercolor paper vs. bristol paper?
11 year old
It was interesting to see each child work out the results they wanted and some kids had upwards to 25 prints experimenting for their "favorite three".
7 year old
7 year old
I will have to do the project again later in the year with bunnies or some other cute animal for the parents to make up for the creepiness of these prints. They are all so beautiful I am going to overwhelm you with pictures in this post.
8 year old
10 year old
7 year old
I mounted each child's favorite three prints on 4X6 paper. A couple of children created something a little larger, but for the most part each print mounts nicely on this size.
10 year old
I am so glad we took a chance visit to Rembrandt's house in Amsterdam. I'll be using this project his house inspired for years to come.


No comments:
Post a Comment