Showing posts with label Halloween art project. Show all posts

Thursday, October 27, 2016

Halloween inspired shadow boxes

I love when students take a project idea and make it their own.

I learned a long time ago to trust children when they divert from an original project plan. Great things have always been the result.

My original project was to have the kids create Day of the Dead inspired boxes. I had pulled several reference photos and as a group we discussed the details they discovered in the photos. I told them about the Day of the Dead celebration in Mexico and they shared with me storied of loved ones who had passed away in their families. We talked about how when we shared stories of our loved ones who were no longer on earth with us, they continued to live through those stories- the basis of the loving and beautiful holiday tradition in Mexico.

I learned about Pancake Grandma. A child's great grandmother who was famous in the family for making the world's best pancakes and several other wonderful family members.

But in the end, the kids were not to interested in creating decorated skeletons. 

Not interested at all.

They wanted to create Halloween boxes and sculptures of themselves trick or treating.

9 year old.


One wanted to create a box of bats flying on Halloween night.

9 year old


So while using the design elements of the Day of the Dead boxes as inspiration, the class project took a sharp turn left with the students at the wheel.

Using oven baked clay, each child created the characters for the narrative scene they wanted to create. They also painted the box with acrylic paints.

Close up of 9 year old box, she's a cheerleader this Halloween and she even added details like the skeleton on the shirt and her pigtails with ribbon, along with the black stockings.


At that point, the hour and a half was finished.

The following week, they painted their sculptures and then built their boxes to tell their unique Halloween story.

Close up of 9 year old box, he consciously chose to simplify the bat form and make one bat a different color. This was a great example of learning about back, mid and foreground.


There was A LOT of glitter applied to the backgrounds.

Rhinestones and holiday themed wasabi tape I picked up on clearance along with some holiday theme greenery.

5.5 year old box. Mom and dad are pirates, she is a princess and their dog is dressed up as Olaf. She added spooky faces to the tree branch! And enjoyed creating a stack of jack-o-laterns for the dog.


I had sticks and wood blocks the students could apply their imagination too.

And they had a ball painting their characters and assembling their shadow boxes. Most of them were creating until the very last minutes of class and they were so thrilled with their final results. 

Close up of 8 year old box, "Vampire" Love the "harvest moon" he created in glitter.

I had them each take a moment to write a note to their future selves on the back of the boxes. The wrote Halloween 2016 and then the story they had created. Since most used themselves as the hero/heroine of the box, in their costume holiday choice for this coming trick or treat night, I believe these will become a cherished decoration of their childhood in years to come.

Close up of 9 year old box. Best friends (you'll notice the cheerleader again from the above box) out trick-or-treating with the artist's pet cat, Taylor. Again the Harvest Moon makes an appearance.


Regardless I am glad I handed control of the project over to the students so pure magic could happen in the studio this holiday season.


Happy Halloween Everyone! 

Friday, October 21, 2016

halloween reduction prints

I introduced a printmaking project to the elementary class last week. I decided to make it a Halloween theme, knowing the kids were beginning to get amped up about the holiday.

Each child created their own composition on sketch paper, focusing on creating a line drawing.

When they were happy, we taped the sketch on top of a piece of styrofoam then had them trace the drawing with a dull pencil. This created an indented line drawing on the foam. To make sure the ink would not settle in the lines when we started pulling prints, I asked them to trace over the indents one more time.

Then I explained that we would be creating reduction prints.

This process is hard to grasp at first, but as we began creating our prints the kids caught on quite quickly. I asked them to pick out three colors of ink for their picture, explaining that we would need to start with the lightest color and work our way up to the darkest color.


This print was pulled with him coloring out the "hole" in the pumpkin for a yellow glow with pencil. The other two prints were pulled after he cut out the area he wanted yellow. In the end, this was his second favorite print.

8 year old, first choice


Two of the children had put moons in the composition and the other child had created a Jack-o-Latern, so all agreed yellow was a good first choice for color.

Using the plate, each child pulled three yellow prints.

Then either using the dull pencil to color out what they wanted to stay yellow or cutting out with scissors the areas they wanted to remain yellow, we pulled a second group of prints on the same paper using silver.

At first I was going to have each child just color out their moons or the glow of the Jack-o-Latern, but the kids found it much easier to actually have a "hole" in these areas to match up the register when they pulled the next group of prints.


9 year old. first choice


To take a little pressure off getting it right the first time, I had each child pick their least favorite first pull to start with when using the silver. This way if it didn't go according to plan, they had another shot before they got to their very favorite pull.

But as this project continued, the kids quickly learned that what was once their least favorite pull....or their favorite pull....changed with each new color we added.

Once we had printed the silver over the yellow, the kids cut out their main subject matter to add another color.

Bats and the witch's hat were inked in black and printed and the pumpkin in orange.  Again the kids started with their least favorite print for practice working up to their favorite print.

And again when they finished, each child found they were enamored with prints they might not of been happy with prior.


8 year old. first choice


Finally two children wanted to add a fourth color and so cut (or reduced, I kept using the word reduce or reduction over and over to make sure they understood the concept of why we call these reduction prints) out the final shapes they wanted to add color too.

The black shadow on the pumpkin and the purple patches on the witch's hat.

They kids each had three prints to take home at the end of the project. I'm sure they will enjoy decorating their homes with them during the Halloween holiday.

They are all spooktacular!

(sorry. I couldn't resist.)

Tuesday, November 3, 2015

spooky etchings without a press

This summer while in Amsterdam, we visited Rembrandt's home.

To be truthful I figured it would be more of a tourist trap and less than inspiring, but my husband and I have been through the museums of Amsterdam a good dozen times so thought something new was in order.

I was so pleasantly surprised by the house, yes, at times it is a bit of a tourist trap but then you get to the second floor where Rembrandt's studio would of been and I could of spent all day there.

And I do mean all day as they had an expert on hand who has studied Rembrandt's traditional ways of mixing paint and was recreating them right in front of you.  His extensive knowledge on Rembrandt's painting techniques and techniques of that period was so impressive and quite interesting.

I have lots of ideas for the high school class on some of the things I learned but this post is about the elementary classes and the project idea I was inspired to try from Rembrandt's house for them.

The house has a huge collection of Rembrandt's etchings. They are quite beautiful and I left Amsterdam wondering how I could present this to the students without a studio press.

And most importantly how to do it at home, should they choose, without breaking the piggy bank.

Using heavy acetate, I cut a square for each child on my cutting board. Then I brought out the scratching tools we use for scratch art, I wasn't sure if it would work, but it worked amazing.

7 year old

I then brought out all my skeleton/mummy reference I have collected from old National Geographic magazines.

Each child choose an image before getting started, like Rembrandt, I asked them to scratch out all the darkest areas first.

8 year old

I then showed them how varying space between the lines would create different value.

10 year old

I think the students found it very relaxing to scratch into the acetate once they realized they didn't have to scratch hard and creating their etching held their attention for much longer than I expected.

9 year old

When finished, we covered the plate in black water-based printing ink and they rubbed off the excess with a paper towel. Then using either cut watercolor or bristol paper, they lightly sprayed some water on the surface of the paper, wiped it off with a clean sponge and laid the wet side of the paper over their plate.

10 year old

Using a clean brayer, they rolled over their plate until they could begin to see the edges of the plate through the paper, pulled the print, and voila!

10 year old

The best part of the project was watching the kids experiment with the printing process.

What happened when they didn't rub off all the ink from the plate?

10 year old

What happened when there was too much water on the paper?  Or not enough?

8 year old

What happened when they put light pressure or heavy pressure when rolling the brayer to make the print?

10 year old

And finally what happened when you printed on watercolor paper vs. bristol paper?

11 year old


It was interesting to see each child work out the results they wanted and some kids had upwards to 25 prints experimenting for their "favorite three".

7 year old

The results have to be some of my all time favorites to come out of the studio.  Yes, they are quite creepy and spooky.  But I loved them so much I asked each child if they would pull a print for me or let me pull a print off their plate when finished so I can frame them to put out in the studio each October.

7 year old

I will have to do the project again later in the year with bunnies or some other cute animal for the parents to make up for the creepiness of these prints.  They are all so beautiful I am going to overwhelm you with pictures in this post.

8 year old

10 year old

There is absolutely no way I could choose just one when the results were this great.

7 year old

I mounted each child's favorite three prints on 4X6 paper.  A couple of children created something a little larger, but for the most part each print mounts nicely on this size.

10 year old


I am so glad we took a chance visit to Rembrandt's house in Amsterdam.  I'll be using this project his house inspired for years to come.


Wednesday, October 21, 2015

Making Mask

While the Wednesday class were making their sugar skulls, one student asked if we would be making Halloween pails like the year before.


I told her we would not be able to create the pails since I did not have enough of the clean paint cans left for everyone.  Then another student asked if we could do some other kind of project for them to use on Halloween which sparked another student to remark, "Can we make mask?"

I hadn't planned on making mask, but why not? To me, this is their class and I do want to honor their request on activities they would like to create and so I came up with a mask making project.


They sketched out their ideas on paper first. One boy proudly brought his new sketchbook to the studio and did his sketching in it. I love that he has a sketchbook and encouraged him by telling him about all of Picasso's sketchbooks I had seen in Barcelona.


I also had some mask that I have collected over the years on display to help the students figure out how to build their mask with paper. They had a great time putting them all on too.


When they were happy with their sketch, they used them as templates when possible for their final work. I also had some templates for those who had drawn their mask too small so they would end up with a mask that actually covered their face.


They built their mask by adding paper parts with glue sticks after painting the pieces with acrylic paint. I had given them watercolor paper to work on since it was by far the heaviest stock paper I had in the studio.  The patch on the above mask actually lifts up! And she worked quite hard to make sure the teeth on the mask look like they are in her mouth. She was quite happy with her results.


This girls' mask at first glance looks pretty simple, however take a look at  that mustache! She built it so that her nose would actually fit through.  So clever.


The Mario mask is actually five parts put together. He wanted the lid of the hat to stick out, so he created a separate piece there in order to fold it out. The nose and mustache are also separate pieces in order to create depth.


And finally this sweet mask. There was no convincing him to add any color or details to his mask. I discovered why when he stood next to the black refrigerator in the studio. His mask blends into the dark and makes him look headless!  Oh my word, the creativity in this group of children knows no bounds.

I usually do not put pictures of the kids on my blog in order to protect them but since their identities are protected by the mask, thought it would be fun to share them wearing their creations.  (I hot glued the black ribbon on the mask so they could wear them for the pictures)

I was thrilled with this project. Even more thrilled that the project was brought forth by the students in the class! I hope they have as good a time wearing their mask on Halloween as they did making them in studio. 

Thursday, October 30, 2014

Happy Halloween!

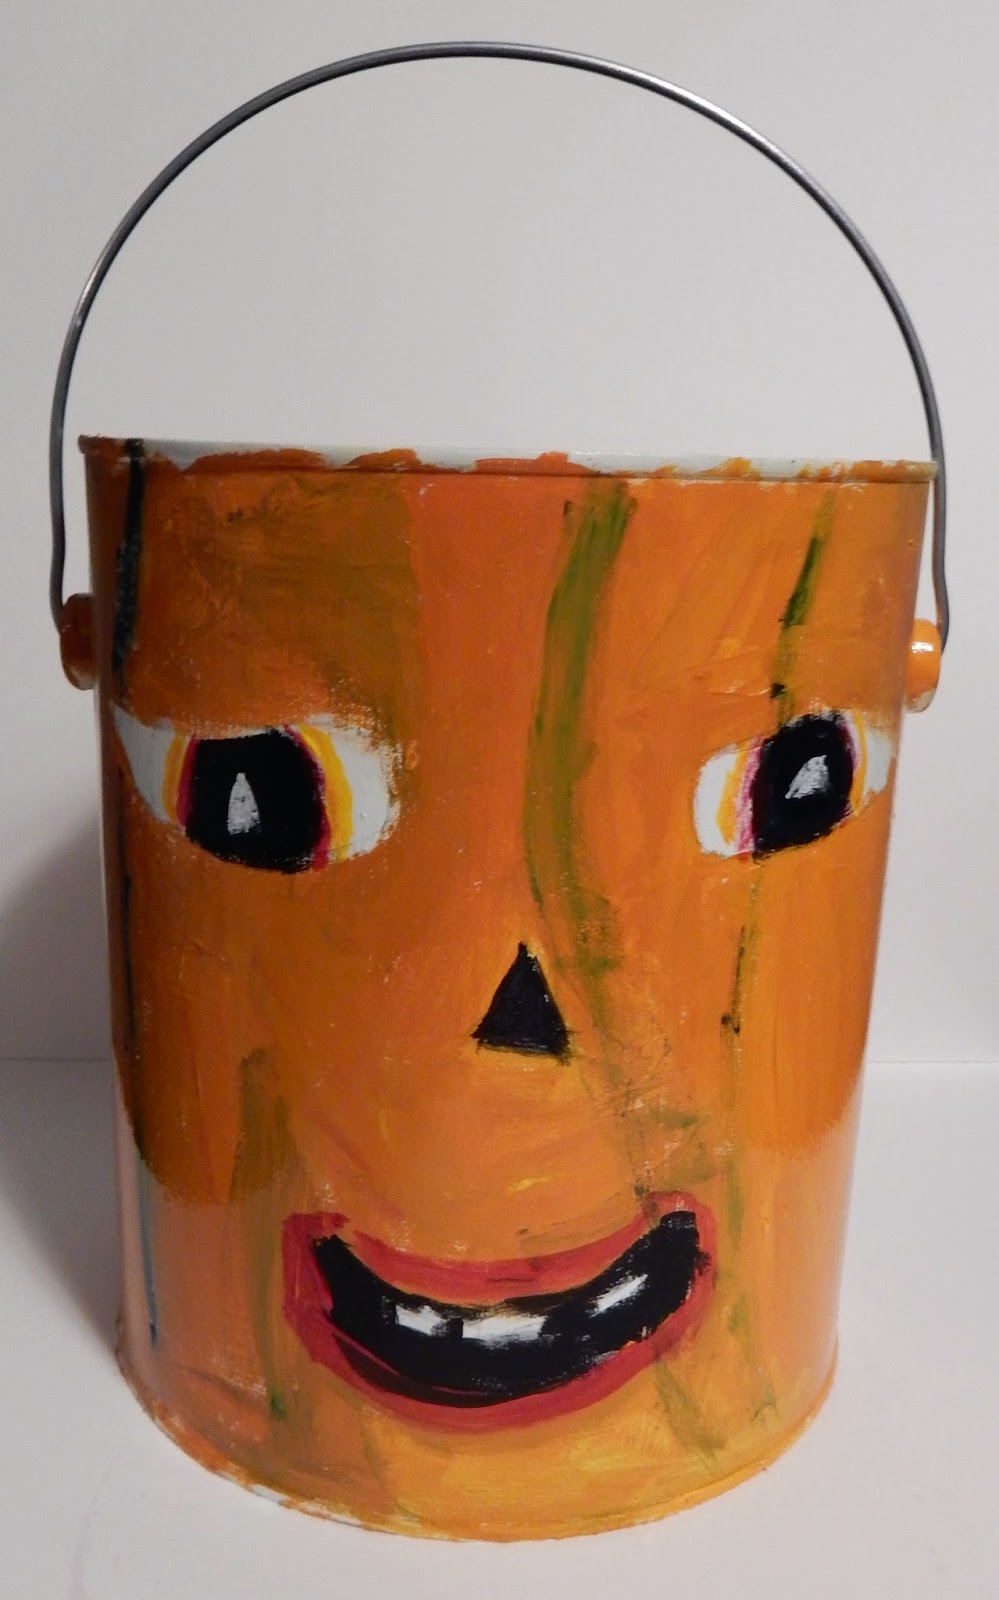
In honor of the holiday, here are some treat pails made in several of the classes this week.

Each child created their own concept for the pails. Some students chose to do something in keeping with their costumes, some did traditional Halloween symbols, and others were just way off the grid...in the best way possible! I was impressed with each and every one of them.

My youngest believes these pails aren't nearly big enough to haul the loot tomorrow night brings, but I thought if the kids didn't want to carry them, their parents could use them to pass out the treats.  I'm guessing they will be put to use both ways.

What I'm absolutely sure of is that each and every student was thrilled with the chance to create one.

Of course the fact I put some candy inside each bucket didn't hurt either.

Happy Halloween everyone.

8 year old


7 year old
to go with her butterfly costume

back

Sea Otter ghost, 8 year old


Back
"Happy Otterween"

11 year old, front


back

10 year old, front

back

 8 year old, front
"Monster Trucks"

back

8 year old, front

8 year old, back

Paint pails were donated to me by my oldest daughter from a display that was taken down at the leather store she worked for a year ago.  I treated them with gesso and the students used acrylics in primary colors with white and black.  I then put a coat of varnish on them to protect the artwork.