Showing posts with label printmaking art lesson. Show all posts

Thursday, November 23, 2017

water based marker monoprints

These lovely monoprints were created during a warm up activity to an acrylic landscape painting project in the teen class.


A warm up exercise!

Created with the humblest of art supplies, Crayola markers and a piece of acetate.


Each teen had picked a reference photo they were considering using for the acrylic painting. They put this photograph under the acetate and then drew the elements they were thinking of including in their painting onto the acetate with the markers.


We had talked a lot about how artist are always making decisions about what to put in and take out of their paintings. What to simplify, what the focus should be and how to move things around to create an interesting composition.


This quick exercise gave each of them a chance to begin making some of those decisions without getting bogged down in getting things "just right" in a sketch.


As they were drawing with the markers onto the plastic, and any old plastic will do for this project, there was some concern that it wasn't working as the ink just kind of balled up on the surface. It was hard to convince the artist that it was OK the marker wasn't covering the surface as expected but since it was a warm up exercise there wasn't too much stressing and they continued forward.


I then gave them a piece of damp paper and they turned their ink drawing face down onto the paper and rubbed.

When they pulled the acetate up, they were all pleasantly surprised with the results.

I was too.


I thought they were so stunning that I matted all of them for the teens to take home.

Sunday, March 12, 2017

monoprint and paint

This started off as a project for a child that finished early.....

Taking a brayer and a piece of palette paper (wax paper or freezer paper on the waxy side would work too) and spreading a dab of black water based oil paint over it.

rose by 7 year old


Make sure your wax paper is a smaller size or exact size of the paper you will be printing onto.

I then had the student create a continuous line drawing of some flowers I had in the studio for another project. Once finished she placed down a piece of clean paper over the waxed paper with ink and then her continuous line drawing and traced all the lines she liked.

When finished she took off her line sketch and pulled up the paper off the oil paint and had a inked line drawing monoprint.

crazy bird, 10 year old


They I gave her a small dab of white water based oil paint and let her paint into the monoprint.

The student loved it.

The other students loved it.

And so a few more asked to do the same thing.

The project was a great study on values as the students were working with white paint on white paper.

In the end, I only managed to capture of few images of the many artworks completed but needless to say there were some very pretty final artworks.

rose, 13 year old


Funny how sometimes lovely and exciting projects happen in the most unexpected ways.

Sunday, July 31, 2016

green man collographs

During the Realm of the Faye art camp, I tried to introduce many different forms of folklore to the kids. With one boy in the class, I needed to make sure the week wasn't focused on just pretty princess fairies. Plus I wanted to have all the children leave with a sense of just how many marvelous different characters existed in the fairy realm of make believe.

One of the more interesting things I learned while researching all things fairy was the Green Man. I can now hardly wait to go to Europe this fall and keep my eye open for him image in the architecture throughout the ages.


His face is covered in foliage and he is seen as a symbol of rebirth, representing the cycle of regrowth each spring. I was amazed at the many different cultures throughout the ages who embraced this image, including images from modern day, and shared lots of different images with the kids of the Green Man.

They were equally fascinated.

I thought the graphic nature of the Green Man in architecture would be easy for the kids to interpret in printmaking. I decided to introduce a collograph project since I had so many young children in the camp.

7 year old

I started by taking some of the cardboard I always save from the back of the paper pads I buy for classes. I cut them into 4x4 squares and covering them in matte medium, giving the the opportunity to dry completely before camp started.

6 year old

The kids then spent the morning cutting shapes out of card stock and gluing them onto the cardboard. I showed them how to layer paper on top of paper to create depth to the work. They truly enjoyed this process and spent far more time than I anticipated creating their faces.

9 year old

As they began to finish, I brought out some yarn for them to add if they wanted to the works. Then in the afternoon after the kids were gone, I again covered the artworks in another layer of matte medium so it would dry before we printed with them the next day.

5 year old

I brought out green, black and gold ink for the kids to use for printmaking. Some kids did not want to print their work in black and went straight to the green. I explained to all of them that they would need to do two or three prints at first just to prime the plate before they would get a really nice one.

7 year old


Lots of discoveries were made while creating the prints. How much ink, how much pressure, how much water to add to get a nice result. While this held the interest of the older children in the camp, my observation with the younger ones was that they enjoyed creating the plates far more than they did printing with them.


6 year old

That being said, I think the Green Man had a lasting effect on the kids as you will see in tomorrow's post. It was interesting to try a different form of printmaking with the kids than I usually do and I will be anxious to take what I learned from my observations watching the children explore the process and apply it to future projects. 


Thursday, March 31, 2016

gelatin monoprint birds

I always like to incorporate a printmaking project into each camp because it is an art form with an element of surprise that always gets the kids excited.

I created a large amount of gelatin plates for some workshops I ran for the North Vancouver Community Arts Council and Canuck Place that I wanted to utilize in all the Spring Break camps I ran this season. So I had the kids create monoprint birds for the "Birds of a Feather" camp I ran through North Vancouver Community Arts Council.


6 year old, Crane

Using a limited palette of printing ink, each child created a hand painted bird on the gelatin plate. Each small gelatin plate was placed on a piece of plexiglass that I keep in my personal studio for a variety of art projects, including printmaking. They have been one of the best resources I added to my supplies and well worth the time it took to cut and sand over five years ago.

6 year old, baby duck

7 year old, robin

There are so many different printmaking projects you can do with gelatin plates and they are easy to make yourself, saving lots of money rather than buying the ones online. I make them in a cookie sheet and then cut them into 1/8th's in order to make it cost effective for large classes. Here is a recipe if you want to try it, I strongly recommend adding the glycerine as my plates last for up to a year making the upfront investment very cost effective. I use them for a variety of printmaking projects and you can find lots of ideas online or on my Pinterest board.

7 year old, blue bird

Each child placed a reference picture under the plexiglass to start the project. I asked them to roughly sketch in their bird with the ink, pulling out the reference picture when they could no longer see the bird.


Then each child spent their time layering the paint and creating their final picture. Some tried to stay true to the reference picture and some did their own thing. I stressed NOT washing out the paintbrush between color so they could get more interesting color combinations. 
6 year old, crane

9 year old, flamingo

As they began to complete the painting, I showed each of them how to use the back of the small paintbrush I had given them to gently draw into the picture. GENTLE is the word to stress as you don't want them to scratch the plate of the marks will be permanent on every print afterwards.


7 year old


Once they were happy with their painting, I gave them two pieces of card stock, each cut just a bit bigger than the plate. I spritzed the paper with a bit of water that I then wiped off with a clean sponge prior to them laying it over their drawing. This will reactivate any dry ink. Then I told the kids to give the paper a "nice back rub", not moving the paper at all. You do not want them to press down, just a bit of pressure as they rub in a circular motion across the paper.

8 year old


Then the fun part, pulling the print! Oh their faces the first time they do it, it is so rewarding to watch. For the most part they are pleased as punch with the outcome, sometimes not, and then we go over what went wrong. Usually there is not enough paint (they rushed and just wanted to get to the printing), not enough pressure when rubbing or they did not rub the entire thing. To be honest even when things do not come out as anticipated, they are still wonderful works of art.

hummingbird

peacock

brown bird


The great thing is that they can do multiple pictures, which they want to do anyway, where they can apply what they have learned along the way to create lovely finished pieces.


Printmaking is always one of the highlights of camp and this project was no exception. It is crazy busy for me, but well worth it to see the kids having so much fun.

5 year old

There are some great moments I cannot plan for that happen, that are great learning lessons for everyone. Lessons like not giving up and problem solving. The below print is a great example of that, the child created a blob on the plate and wanted to wash it off at start over. I encouraged him to find the bird within the blob, to add paint over the mess and create something out of it.

6 year old

Pretty amazing, right? Created out of a mess of a black blob. I stopped the class to show them what the little boy had done, first to reaffirm to him that it pays to not give up and work through something and second to show by example why every other child in the room should do the same.


One of the other highlights for the kids was the ghost prints. This is the print pulled with the leftover ink left on the plate after the original print was pulled. I stress to the kids that sometimes you get something really neat and other times really nothing at all. Sometimes the ghost print even ends up being the favorite print!

6 year old ghost print

6 year old ghost print

7 year old ghost print

The kids had so much fun creating these works. There were some beautiful monoprints made in the camp. I took all of them home and remounted them for framing. This is time consuming on my part, but I feel is important in order to honor the work the kids have put into creating the art.

9 year old

I think each child finished this project big fans of printmaking, almost as big a fan as I am of their finished birds.


Thursday, January 21, 2016

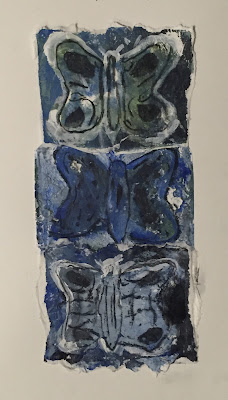
butterfly mono prints on gelatin

There was a birthday party in the studio last night for a 13 year old girl.

After a few discussions with her and her mother, she decided to do a project on gelatin printmaking for her and nine of her friends.

Let me just say, there is not a rock concert in the world that holds a candle to the volume level of a small room filled with ten very happy and excited 13 year olds. I believe my ears might still be ringing.

The girls started off by sketching a butterfly shape on card stock and then cutting it out to use as a stencil.

birthday girl

Then I pulled out the gelatin plates. The girls were fascinated that they were using a jello substance to print on and even asked if they could eat it, which I quickly explained they could not since it also contained glycerine in the mixture.

They first started with a piece of bristol that was cut slightly larger than the gelatin plate. They "inked" the plate with some white, blue and yellow acrylic paint using a brayer, created some texture by stamping into the paint with some bubble wrap and burlap, then pulled a print.

I then asked them to put some blue paint on the burlap and stamp that into the plate, take the same piece of paper and pull another print.

Then using primarily white paint, asked them to once again color the plate, place down their stencil, and using the same piece of paper pull yet another print.


I had also given them two sheets of palette paper, the same size as the bristol. 

(I think freezer paper would work just as well)

Using the non-waxy side of the palette paper, I asked them to pull a ghost print of the leftover paint on the plate.

Now I asked them to use black and blue to paint the plate. They laid down a bit of string and their stencil and now using the the second paper they had made a ghost print on, pulled another print.


Then using the first piece of paper, the bristol, they pulled a ghost print using the leftover ink.

This made some of the girls unhappy, not going to lie. They liked the bristol print they already had and could not understand why they were printing on top of it again.  They were even more unhappy when they pulled the ghost print as they lost a lot of the previous work.

But all was not lost because once again, they added a lot of white to the plate, laid down the string and the stencil and pulled the last and final print on the bristol paper, the first paper they started with and voila! that is the middle print you see on all this artwork.

Happy girls again.


Now with the leftover white ink on the plate, they took the final piece of palette paper and made a ghost print using the non-waxy side of the paper.

Once more laying down blue and black paint, the string and the stencil, they took one final pull using the third paper.

They now had three complete prints of their stencil and a stencil that was barely hanging on in one piece. Thankfully they no longer needed it to complete the project and could throw it away.

At this point, I told them they could go into their work with a small paintbrush and add any details they wanted. I stressed trying to stay loose and use the brush sparingly so they did not loose the essence of the print work they had just finished.


Once done, we gave the tables a quick clean and began mounting the three prints. The idea was the combine them so it looked like one piece. 

The girls first cut the bristol paper to the paint lines using scissors and glued it down in the center of the paper.


I then showed them how they could use the top of the paintbrush dipped in water to "cut" the two palette papers. All you do is create a line with water and then gently pull. This gives a very organic edge to the work, which lets it blend nicely into the bristol paper when pasted on top.


Or not, as this artist decided to do. She wanted all three prints separate and it's good to see the project looks just as nice. I love when students stay true to themselves and in the process teach me something new about a project idea.

Anyway the idea of "cutting" with water and the back of a paintbrush made some girls quite unnerved and so I assured them it was fine to use scissors if they wanted too.


They cut out the last paper, using either scissors or the paintbrush and water, and glued it on top of the bristol paper. For glue, we used just a basic glue stick, nothing fancy.


And once all three pieces were mounted together, each girl had the opportunity to add a bit of charcoal into their butterflies for one last bit of detail.

Then it was time for cake and goodie bags.

And more squealing, giggling, and general noise at a decibel level that would impress any rock band.

The birthday girl had taken the time to make each goodie bag reflect the likes and personality of each friend. Is that not the sweetest? I think it was a great example of the character of girls in the room that night.

I hope they all had fun, I sure enjoyed meeting them.

Happy 13th Birthday Ms. A!!