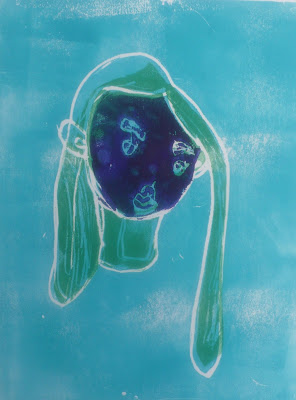
Each girl ended up with three complete prints at the end.
We spent quite awhile going over the basic rules of creating a face and they each worked on a portrait of themselves while looking in a mirror.
What shape is your head?
How much of your eyelid shows?
Do you see a lot of your nostrils? What shape is the tip of your nose?
Are your lips full or skinny?
Is your hair straight or curly? Where is your part?
On and on it went until they were happy with their work.
6 year old
Then they took their sketch and taped it on top of an 8.5X11 piece of styrofoam and traced just their OUTSIDE lines with a dull pencil, just hard enough to make an indentation.
I asked them to not un-tape the sketch from the styrofoam until they double/tripled check they had traced all their lines.
Once they knew they had all their lines, they took off the sketch paper and went over the indentation lines with the dull pencil one more time. This time with me stressing not to push down so hard they went through the styrofoam.
7 year old
Love that she added pierced ears because she wishes she had them!
Once everyone was to this point in the project, we sat down and discussed color. I explained they would be adding three colors to their prints, starting from a light color to a dark color plus one "in between" color. We talked about colors being put into two groups, cool and warm, and I asked them to tell me where they thought their favorite colors fell into these groups. I then told them about how color is used by artist to create emotion and I asked them to tell me what emotions their favorite colors might represent. Finally, I asked them to choose either the cool or warm color group to work from and then three colors from that group.
They chose to be "cool" chicks.
8 year old
Then we started the printmaking process.
First they made three prints with just the turquoise of only the outside lines of their sketch. These lines printed white.
7 year old
She was quite unhappy with the line she added at the base of her neck and wanted to "erase" it. She was quite frustrated that she couldn't until my 17 year old daughter, who helps me, suggested making the line into a necklace. She went from hating to loving that line at breakneck speed.
Once they had three turquoise prints, I asked them to wash off the plate and cut around the outside of their head. We cut around the head of their sketch first, just so I could make sure they understood the directions and to make it easier to place it properly over the styrofoam once it was also cut out.
Then they once again traced everything else from their sketch onto the styrofoam and then going over the indent lines with a dull pencil.
The girls then took their least favorite turquoise print and printed the green face on it.
I always have them start with their least favorite and work up to their favorite, so the learning curve is complete by the time they get to that favorite print to avoid disappointment.
What I usually find is that the favorite print changes with each subsequent reduction.
5 year old
When each girl had three green faces printed, they once again washed off the plate and cut out one part of the face to be printed in purple.
Then they started the whole process over a third time, picking their least favorite of the prints to their favorite to print with purple.
I find even the youngest are able to get the hang of getting the subsequent prints on-register, but always tell them how much I like the energy of off-register prints too.
11 year old
She decided to do one print with the hair highlighted in purple and another highlighting the face
This project demands a lot of concentration of the kids part and a lot of work for me and my daughter, but it is well worth it. I find that although there are a lot of steps and in-depth concentration needed, the kids completely engage in the project and hate to see it end.
They were working right up until their parents (or grandparents) arrived to pick them up.
It was a nice project to end the workshop with and I was so impressed with each girls' talent throughout the two days. I loved working with all of them.
There are three spaces left in the last of the Summer Workshop Series for Children on July 28th. This is a one day workshop from 2-4pm and the kids will be working on "giant" canvases.
This is how one 7 year old described them in studio this week while participating in the "Drawing from Nature" camp
If you would like your child to participate in the workshop, please contact me through KudzuStudio.com.


No comments:
Post a Comment